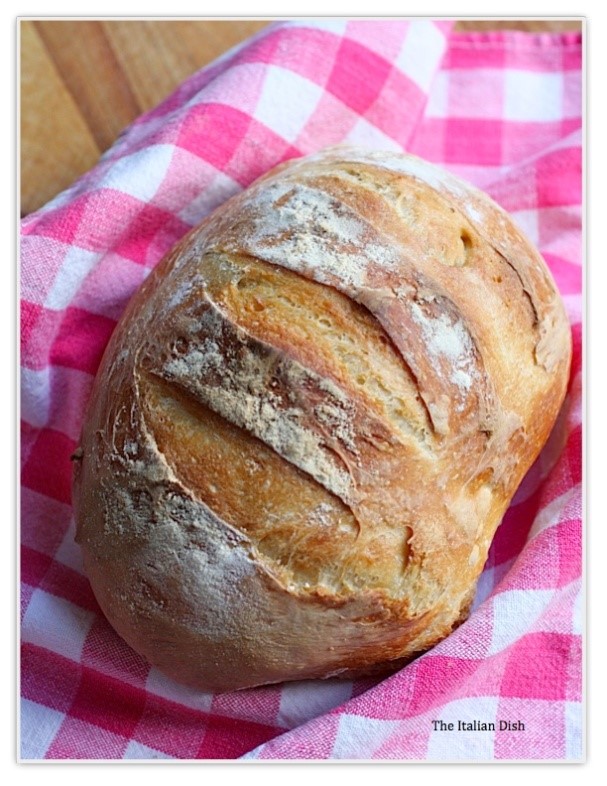
Amazing Artisan Bread
Chef: elliott
- serves 4
- cook time 120 minutes
What if I told you that instead of buying bakery bread for four or five dollars a loaf, you could make delicious handmade bread whenever you wanted, at a fraction of the cost and it is so easy a kid could do it? Well, read on because this method of making artisan bread at home will change your life.
You can make incredible bread without having to do all the usual time consuming tasks of breadmaking :
- no need to make a new batch of dough every time you want bread
- no need to proof yeast
- no need to make starters or prefermented dough
- no kneading!
One way of letting the dough rest and rise is to place it on a pizza peel, dusted with some cornmeal. This works well when we make pizzas and pop them right into the oven. However, for this the bread seems to stick because you have to let it sit so long on the pizza peel and rest. So I place a small square of parchment paper on the pizza peel and put the dough right on that. When I slide it into the oven, it goes in along with the parchment paper and bakes up beautifully. If you want an extra crispy crust, just remove the parchment paper halfway through the baking time and return the bread to the pizza stone - this is what I do.
The dough can be stored in any plastic container with a lid or a bowl with plastic wrap placed over it. You want the gases to be able to escape as the dough rises, though - so wrap the plastic wrap over the bowl tightly and then puncture a little hole in the top. It is nice to have a dedicated plastic container, though, in the fridge for your dough, because you are going to just keep it in there all the time. Although these containers are recommended by the authors and the King Arthur Flour website has these nice dough rising buckets, I bought a square plastic-lidded container at my local grocery store because I thought it fit in my fridge better. You can see it in the photos below. I place the lid on tightly, but I punched a small hole in the top. This is important to do.
So get out a bowl if you don't have a plastic container, mix up a batch of dough and have your first loaf tomorrow. You won't believe it.
(My favorite way to make this bread now is to use half bread flour, half all-purpose flour and throw in 3/4 cup wheat bran into the dough.)
After baking, if your bread is gummy on the inside, try either increasing the amount of flour by 1/4 cup and/or increasing the baking time by 5-10 minutes.
Also, If the dough is just too sticky for you to work with comfortably, increase the flour in your next batch.
Ingredients
- 6.5 cups - All-Purpose White Flour Unsifted, Unbleached
- 1.5 tbsp - Granulated Fast-Acting (Instant) Yeast (2 packets)
- 1.5 tbsp - Kosher/Other Coarse Salt
- 3 cups - Water Lukewarm
Directions
Mixing and Storing the Dough
1. Warm the water slightly. It should feel just a little warmer than body temperature, about 100 degrees F. Warm water will rise the dough to the right point for storage in about 2 hours.
2. Add yeast and salt to the water in a 5 quart bowl or a plastic container with a lid.
3. Mix in the flour - kneading is unnecessary. (Note: I dump all this in my KitchenAid mixer, let it mix it for just about 10 seconds and then put it in the plastic container. I just find it easier to let the mixer do this part). Add all of the flour at once, measuring the flour by scooping it and leveling it off with a knife. Mix with a wooden spoon - do not knead. You're finished when everything is uniformly moist, without dry patches. This step is done in a matter of minutes. The dough should be wet and loose.
4. Allow to rise. Cover with a lid (not airtight). Lidded plastic buckets designed for dough storage can be purchased many places. (I used a plastic square food storage container at my local grocery store. I just make sure that the lid is not snapped on completely). You want the gases to be able to escape a little. Allow the mixture to rise at room temperature until it begins to collapse (or at least flattens on top), about two hours. Longer rising times will not hurt your dough. You can use a portion of the dough any time after this period. Fully refrigerated wet dough is less sticky and is easier to work with than dough at room temperature. So, the first time you try this method, it's best to refrigerate the dough overnight (or at least 3 hours) before shaping a loaf.
Baking
5. Shape your loaf. Place a piece of baking parchment paper on a pizza peel (don't have a pizza peel - use an unrimmed baking sheet or turn a rimmed baking sheet upside down). Sprinkle the surface of your dough in the container with flour. Pull up and cut off about a 1-pound piece of dough (about the size of a grapefruit), using scissors or a serrated knife. Gently stretch the surface of the dough around to the bottom on all four sides, rotating the ball as you go. Dust your hands with flour if you need to. This is just to prevent sticking - you don't want to incorporate the flour into the dough. The top of the dough should be smooth - the object here is to create a "gluten cloak" or "surface tension". It doesn't matter what the bottom looks like, but you need to have a smooth, tight top. This whole step should take about 30 seconds! Place the dough onto your parchment paper.
6. Let the loaf rise for about 30 - 40 minutes (it does not need to be covered). If it doesn't look like it has risen much, don't worry - it will in the oven. This is called "oven spring".
7. Preheat a baking stone on the middle rack in the oven for at least 20 minutes at 450 degrees F. Place an empty rimmed baking pan or broiler pan on a rack below the baking stone. This pan is for holding water for steam in the baking step. (If you don't have a baking stone, you can use a baking sheet, but you will not get the crisp crust on the bottom. You will still have a great loaf of bread. Baking stones are cheap and easy to find - Target carries them - and are a must for making pizzas, so go out and get one as soon as you can.)
8. Dust the loaf with a little flour and slash the top with a knife. This slashing is necessary to release some of the trapped gas, which can deform your bread. It also makes the top of your bread look pretty - you can slash the bread in a tic tac toe pattern, a cross, or just parallel slashes. You need a very sharp knife or a razor blade - you don't want the blade to drag across the dough and pull it. As the bread bakes, this area opens and is known as "the bloom". Remember to score the loaves right before baking.
9. Bake. Set a cup of water next to your oven. Slide the bread (including the parchment paper) right onto the hot baking stone. Quickly pour the water right into the pan underneath the baking stone and close the oven door. This creates the necessary steam to make a nice crisp crust on the bread. Bake at 450 F for about 30 - 35 minutes, depending on the size of your loaf. Make sure the crust is a deep golden brown. When you remove the loaf from the oven, you will hear it crackle for a while. In baking terms, this is called "sing" and it is exactly what you want.
10. Cool. Allow the bread to cool for the best flavor and texture. It's tempting to eat it when it's warm, and that's fine, but the texture is better after the bread has cooled.
11. Store the remaining dough in the refrigerator in your lidded (with a hole punched in the top) container and use for up to 14 days. Every day your bread will improve in flavor. Cut off and shape more loaves as you need them. When your dough is gone, don't clean the container. Go ahead and mix another batch - the remaining bits of dough will contribute flavor to the next batch, much like a sourdough starter does!
Bread is best eaten the day it is baked. Leftover baked bread is best stored at room temperature, unwrapped. Simply place the cut side of the bread on plate or counter. If your bread is gummy on the inside, try either increasing the amount of flour by 1/4 cup and/or increasing the baking time by 5-10 minutes.